Furoshiki is a square-shaped fabric used for wrapping. This century-old Japanese fabric wrapping tradition is a great way to reduce your holiday waste from all the gift wrapping. Obviously the initial "investment" cost of a piece of fabric can be more expensive than a piece of wrapping paper, but it can be reused many many times, keep it in your bag as a napkin or handkerchief. If you have left over fabric for a project, hem the edge up and start wrapping!
One criteria I have learned is that it needs to be square, since many folding style structured from a square piece of fabric. You can create your own folding style too if you have an rectangular of odd shape piece of fabric. Tutorials below show styles from square fabric cut.
Typical furoshiki size, illustrated below (not to scale):
Our shop at the local craft fair carries the following sizes and what they can be used for:
Here are some of the ways you can use our furoshiki.
_______________________________
1. Fold your fat quarter over, creating a square triangle area. Cut along the extra material to turn your fat quarter into a square.
Note: This tutorial works best with non-directional fabric. If you want to use directional fabric, just frame the fat quarter folded triangle to your fabric as a template. I have it laid out here for example, you can see the diagnose from the FQ square will be bigger than the folded fabric off the bolt, so you will definitely need more than a FQ if you choose to make it with directional fabric.
2. Fold the triangle in half along the longest edge (ie. the edge that you used to fold the fat quarter into a square in the previous step).
3. Measure from the top edge to the diagnose side to where it is about 5 inches from the top. Cut along this edge. Now you should have a folded piece of fabric that looks like a shape a bandana.
4. Keep the wrong sides together, sew along the edge of the bandana, keeping a gap open for turning. Seam allowance is 3/8" (1cm).
5. Trim the corner. Turn the bandanas inside out. Tuck the edge at the gap in nice and neatly.
6. Give it a good press then top stitch. You can wait to press at the end, but pressing now will give you an easier time to top stitch.
7. Fold the top down about two inches from the top. This creates a gap big enough for even the largest dog collar (which is about 1.25", size according to popular dog collars on amazon.com). If you didn't wash your fabric before sewing, this gap may shrink smaller and no longer fit the collar.
8. Pin along the edge. Top stitch over the other stitches. Thread the collar through the gap created and it's ready to use.
Scrunchie size is really depending on how small or large you prefer them to be, for kids or adults, as well as the fabric type that you have. Typically, thicker materials like velvet should require less material since you don't want it to bulk up too much that the elastic can't hold your hair, and thinner material like rayon or cotton lawn could use a few more inches of length to create a fuller look. Here are some of the dimensions I use for different types of fabric. These dimensions work for 3/8 inches (1cm) seam allowances, I found that using slightly smaller (1/4") or larger seam allowances (5/8") don't really impact the final shape of your scrunchies very much, but if you like to keep them consistent then just make sure you add or substract them to your cut fabric as needed.
The following dimensions are given for (extra?) large size, which are the red teddy bear, pink double gauze and pink Liberty London Betsy floral I have in the photo above. You can see how they fit on my wrist, scroll down below.
1. Fold one edge of the end down about 3/8 inches (1cm). Press to keep it in place.
2. Right side together, sew the long edge of the fabric together. Make sure to sew the folded edge.
3. Turn the "tube" inside out.
4. Insert the elastic. Tie it with a knot for thinner elastic (I'd like to do two loops to keep it from unravelling. Add a glob of fabric glue if you want extra security.) or sew zigzag if using the wider elastic. This Clip N Glide Bodkin does make thing easier if you use wide elastic.
5. Insert the raw edge of the tube inside the folded edge of the tube. Make sure at least 3/8 inches (1cm) of length is inserted inside.
6. Roll the elastic to make sure they are not twisted inside the tube. Roll it into the middle of the tube. Sew the edge close. Add a tag if you want to customize it.
I always have some bolt end fabric on hand. Although we're selling quilting fabric, most of my projects are clothing for my kids and myself. But one of the things I really like to sew is zipper pouch. They're great scrap buster or fat quarter projects. They're great to store little things. My kids used it for their mask and hand sanitizer bags, pencil bags, etc.
3. Top stitch the main fabric and lining on to the zipper.
4. Open the zipper more than half way to prepare for next step.
5. Turn the right side of the fabric to face each other, and the right side of the lining to face each other.
6. Starting from about a quarter of the bottom edge of the lining fabric, sew the round at the edge from the lining to the main fabric side, back at the lining, leaving about 1.5 to 2 inches gap for turning.
7. Turn the right side of the main fabric out.
8. Folded the edge of the gap from the lining neatly. Top stitch to close.
Here's one that I did with embroidered k-pop hand love sign. <3
]]>I chose this red Hello Kitty and circle dot fabrics I got from a Facebook destash group to sew a pair of summer shorts for my LO. To accent, I use pique crochet edge bias tape from our Bee Handmade Boutique shop.
You may be wondering what pique fabric is? The pique fabric used in this bias tape is similar to dobby or textured fabric but it has a corduroy feel on the surface. For this project, with the fabric, lining fabric and hidden seams, there were sections where I had to sew up to all 6 layers of fabric and bias tape together. My lazy bump didn’t want to change the to a larger size needle during sewing, so I had to stop and manually feed the thick layers of fabric in to sew. It may not have been the best choice but its color is popping against the bright red hello kitty fabric. I’m very with how it turns out.
About the pattern, I wish it was easier to follow. In many places it is too wordy to read, and the photos aren’t helping at all. All cut pieces are of the same color blue, so it could be hard to decipher which is which, especially with cuts that look similar. I even bought the adult pattern of these shorts, but it turns out that they use the same instructions. I felt a little bit cheated.
For the elastic waist band, I didn’t have the 1 inch elastic like the pattern suggested, so I used the 3/8″ that I have 50000 yards and probably will never use it up so I figure I just use it here. This makes the waist band looks a bit funny to me. On top of that, I didn’t like to use the crochet edge binding for the legs because it was so thick, so I decided to use the leftover Michael Miller Magic bias tape I made a while ago for my sister’s baby quilt. Do you think they look a little funky because it is not matching?
Regardless of all the mishap, it is finished, and it is so adorable!! I made size 6-12 month for my 8-month-old daughter but it is still too big, I thought it would fit since she uses cloth diaper and could use some space in the shorts, but it didn’t fit. I don’t think it is the pattern’s sizing issue, my daughter size is 10 percentile in her age, and she has just grown out of her 3-6 month clothes, so it’ll probably be a few more months before she can use it.
_______________
Affiliate Link to Rebecca Page for Berry Bubble Shorts by Rebecca Page PDF Pattern.
*Affiliate Link means that if you click the link and make a purchase at the website, then I receive a small commission.
]]>My little sister is getting married in August and they want a simple wedding, just to the court house then a small intimate BBQ at home. She's been trying on wedding dress and sent pictures to us (she lives in England and we live in the US!) and has not been able to find one that works for her budget. So I wanted to make her a dress... If it is pretty and fit, then she can wear it. If not then, oh well.
I immediately chose Paris Party Dress by Rebecca Page Pattern as my basic to start. It is mostly because all of the dresses my sister tried on reminded me of this pattern. This pattern is so versatile and have many add on that you can do a lot with it. A simple top with A-line skirt. I'm thinking to have a lace lining short sleeve top with a knee-length skirt with tulle underneath. So here is my vision (not in Red, of course!)
Sewing the Muslin
For the muslin shirt, I chose these two fabrics from my stash: The white one is either a modal spandex or bamboo spandex from Knitpop scrap pack. These are amazingly stretchy and I love the off white color. The lace is from one of the clean out sale by Sincerely Rylee. I bought it impulsively since it was only $2/yard. I was going to destash it since I didn't know what use I will have with these white stretch lace. I had layered it on other knit but just feel like it doesn't really suit my style. When I knew I wanted to make this dress, I immediately knew this would be the right lace for it.
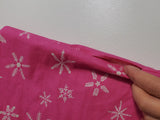
For the skirt, I used silk as the top layer. I meant to use some satin but the ones in the wedding section at Joann is quite expensive. Since I didn't know how it will turn out, I opted for the cheaper version from the regular Apparel section. I also bought some sateen to use as the lining fabric. This is not the fancy sateen like the Nani Iro Fuccra sold in our shop, it doesn't have a glossy or shiny side. As the matter of fact, after cutting the fabric I had a hard time figuring out which is the right or wrong side of the fabric. So it is fitting to be used as lining. And I bought some cheap tulle, with the current sales, it comes down to like $1.75/yard or so, to create the puffy effect like in the inspiration shown above.
Sewing the shirt is easy enough. This is just a typical T-shirt. There was a little confusion trying to layer the lace, but just following the instruction along (without questioning too much or trying to be my usually smart@ss self), it all works out. Now that I have a coverstitch machine, hemming is so much quicker and more enjoyable. I really like the shirt, but it is likely that I will re-do this to something else. Why? Had I forgot to mention that the white shades of the shirt and skirt do not match.
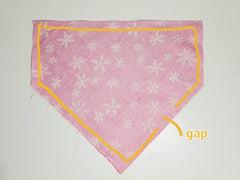
Sewing the skirt is another story! The original Paris Party Dress pattern is a pleated skirt with zipper. I used the pattern piece as is, but changed into gathering and elastic waist band instead. This is to ensure that it will fit my sister regardless of how mess up it could get. In addition to that, I also use the skirt Add on, with lining and petticoat. And I also added pockets!
I didn't anticipated how much fraying silk and sateen are... but they both sewing very nicely, especially sateen. On the other hand, gathering tulle is more difficult than I anticipated. A little thing I learn here: Loosen your tension and shorten your stitch length as little as you can. And instead of letting the tulle bunches up because you need the extra thread to adjust your gather.
Sunday 7/9 - So the box is on its way across the pond to England . We will wait to see!
]]>